Are you having trouble adding sizes to your Shopify store? You’re not alone. Many online merchants struggle with how to add size variants when setting up their Shopify stores. But don’t worry. It doesn’t have to be complicated. This article will provide a step-by-step guide on How to Add Sizes on Shopify for maximum shopping cart potential and customer satisfaction. So let’s get started!
Benefits of setting up size options in your Shopify store
Offering Shopify image size options for customers in your Shopify store is a great way to keep customers engaged and increase sales. By setting up size options, customers can easily find items that fit them perfectly, encouraging return visits to your store and loyal customers.
Additionally, providing different Shopify size chart pop-ups can save you time when packing up orders. The ability to quickly sort an order according to the customer’s size needs reduces their wait time and reflects positively on your brand name.
Giving buyers the size options they need ultimately increases customer satisfaction and builds trust with your brand – both critical for businesses seeking long-term success.

Step-by-step guide on how to add sizes on Shopify
Here are a couple of different ways to add sizes to Shopify. Select the one that best fits your shop –
Add Sizes or Variants for Brand New Products
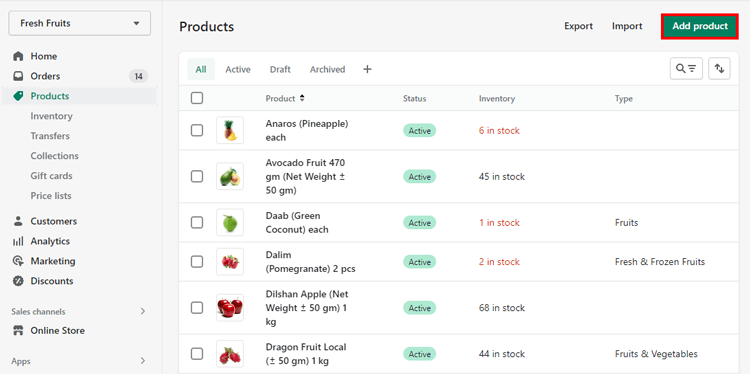
Step 1: Add a brand-new product
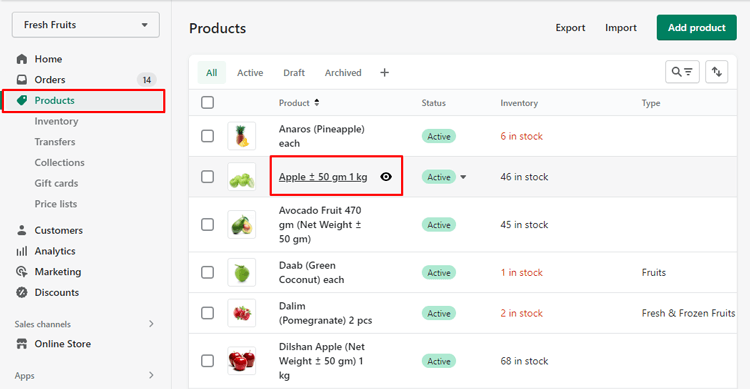
Now that you’ve opened your Shopify page, it’s time to add a Shopify image size guide for that new product you’ve been dreaming about. First, navigate to the “Products” section, Click on All products and look for the corner to the right.
A single click of the “Add Product” button will jumpstart you toward finally having this item in your store.
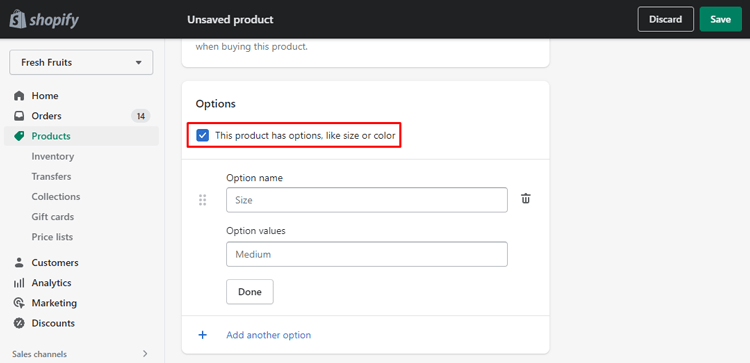
Step 2: Add variants.
Once you’ve added all the basic details to your product, it’s time to make your products even more desirable by creating variants.
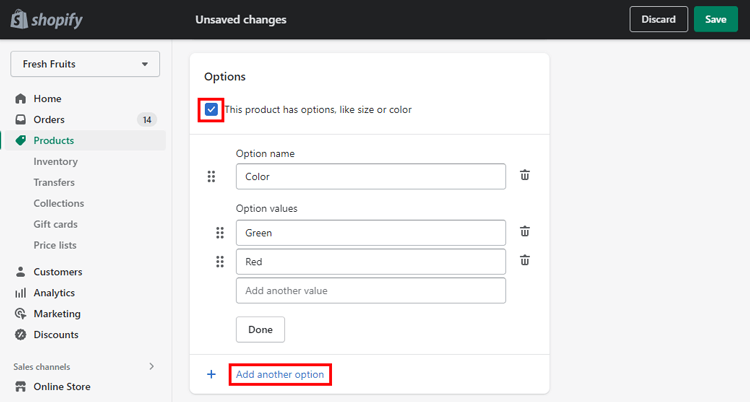
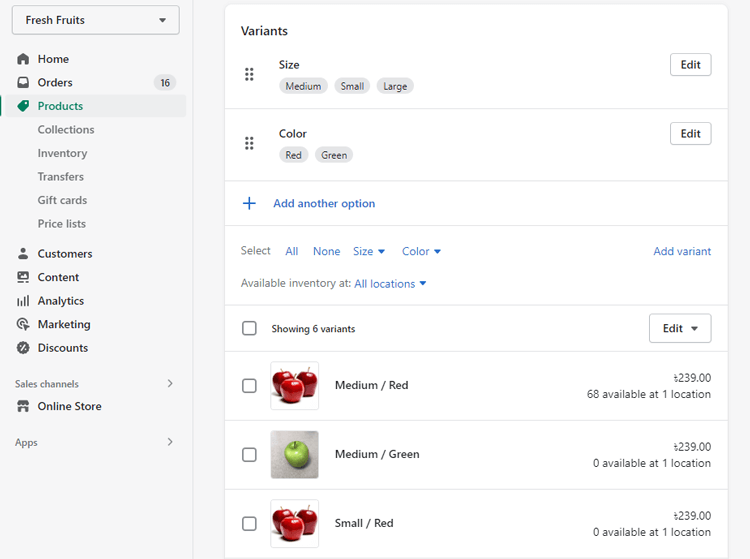
You can do this on the Add Product page under Variants – click “small box” on the left of the line to indicate that “This product has options, like size or color“.
This tool allows customers to select from various variants when purchasing from you, making their shopping experience more rewarding and customized.
Step 3: Enter the Option name.
After clicking the “Add another option” button on your product configuration page, you’ll be invited to enter an option name.
The default will be Size, but depending on the particular product you are creating, you may select other existing options such as Color, Material, or Style.
Step 4: Enter Option values.
The fourth step involves adding sizes or variants to a brand new product, and you can easily input relevant option values. For example, if “Material” is the option name, you can quickly add a few basic options such as “Cotton” or “Leather,” into the box provided.
This makes it convenient for customers to choose when purchasing a product with varied sizes and variants available.
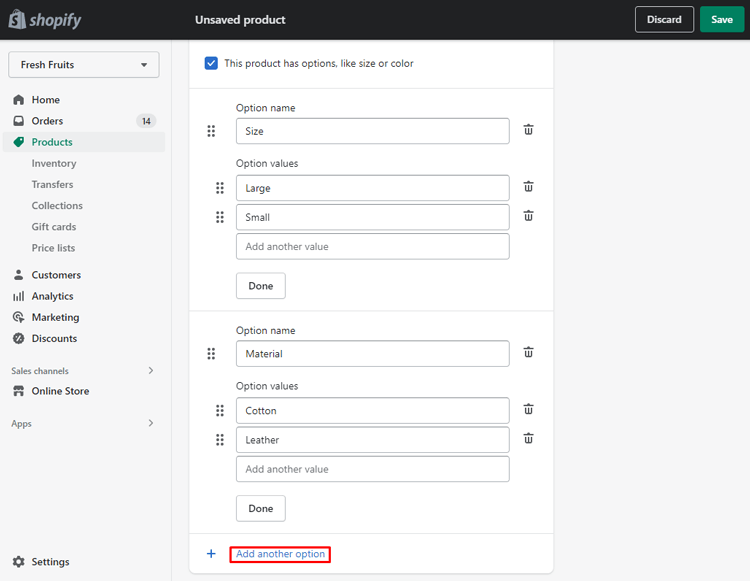
Step 5: Create another variant option.
Select the “Add another option” option if there are multiple choices. After that, create a new one by following the directions indicated above. Remember that you can enter a maximum of three options in this field.
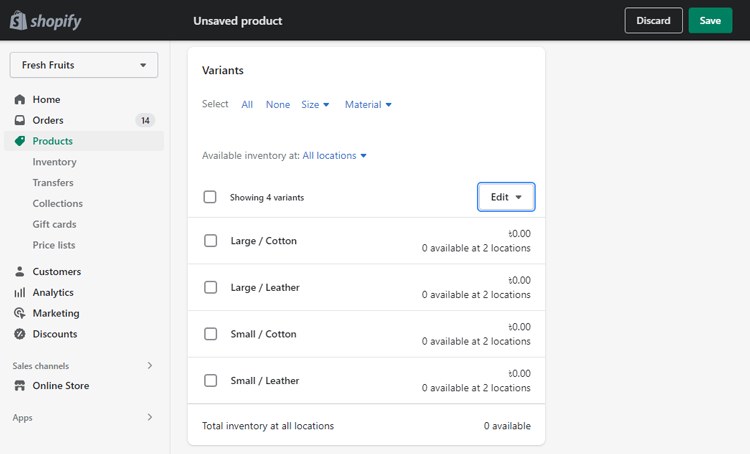
Step 6: Manage variant options.
Adding Shopify image size guides or variants to brand-new products can provide value to your customers by offering a more comprehensive range of options.
Managing these variant options in your store is an important step as it allows you to uncheck items you no longer wish to sell and make changes to the price, SKU, and barcode of each item if desired.
In addition, this careful management allows for more control over pricing, stock amounts, and more in your store, enabling customers to find what they need quickly.
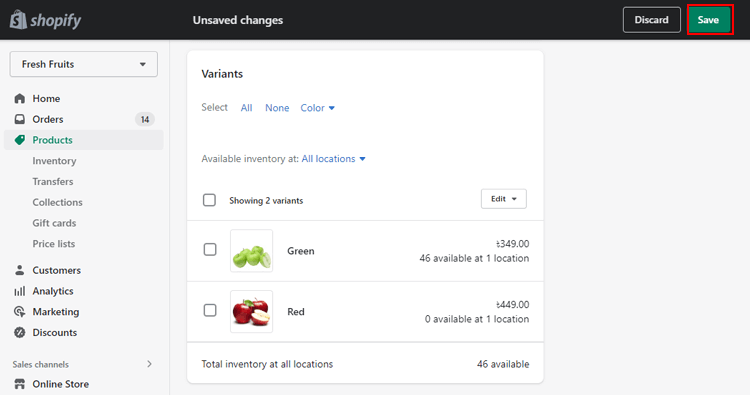
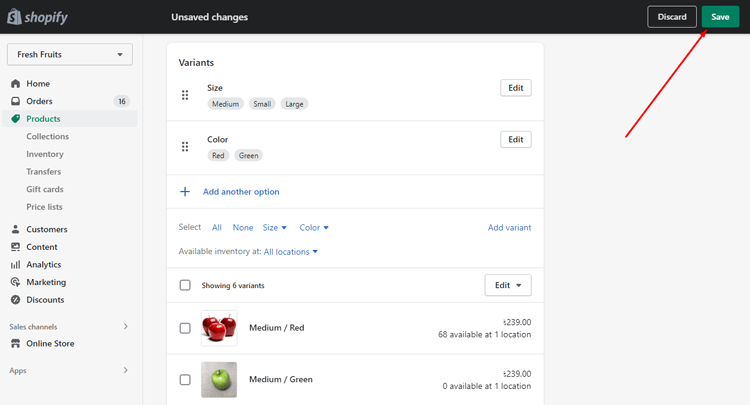
Step 7: Save variants
Click the Save button to save all your work.
Add Sizes or Variants for Existing Products
Step 1: Select an existing product in your Shopify Admin
If you want to add some variation to an existing product in your Shopify store, the first step is to log in and navigate to the Products section.
Here you can select the desired product for which you’d like to add variants, such as sizes or colors. It’s a simple process: click on the product and then go ahead and make all the necessary changes.
Step 2: Select Add variant under the Variant section.
Then, select “This product has options, like size or color”. and click “Add another option” The option’s name will be changed to Size. You modify them, nevertheless, to meet your requirements.
Step 3: Enter Option values
You can enter various values into the Option values field in the Option values, such as Black or Brown. Commas must separate these values.
Step 4: Include still another alternative.
Choose If you have other versions, add another option to provide more choices.
Step 5: Manage variant options in step six.

Manage the variant options in your store by unchecking the ones you don’t want to sell any longer. Additionally, you are able to modify the price, the SKU, and the barcode in this part.
Step 6: Click Save
Finally, it’s time to click “Save” to save all your work.
Add Variants Using the Duplicating Method
Step 1: Access the section for all products.
Go to Products and the All products area after opening your Shopify admin.
Step 2: Decide which product name to change.
Next, decide on the name of the product you want for a different variation.
Step 3: View every variant’s detail
After seeing a version’s details in the Variants section, move on to the Duplicate variants section by scrolling down.
Step 4: Modify the Option value for how to add sizes on shopify products.

The next step is to alter at least one option value to produce a distinct version. Following that, you can add a brand-new option value or one already used for the product variants.
Step 5: Click the “save” button
Save the settings.
Tips for maximizing shopping cart potential with the right sizing options
To maximize your shopping cart potential, provide customers with detailed product measurements for clothing, accessories, and other goods so they can make more informed purchasing decisions.
Store owners should add a size chart and measure their inventory carefully and consistently with standardized metrics. It helps ensure customers can accurately get what they need in the right Size.
Additionally, adding custom Plus-size items or custom sizing is essential for stores that want to appeal to a broader customer base. By giving shoppers these options, retailers show understanding and dedication to ensuring everyone feels comfortable using their product.
Finally, providing detailed measurement charts and guidance on how customers find the right fit can significantly enhance the overall shopping experience, leading to more conversions and sales.
Get Exclusive Shopify Services by ShopiBuffet
ShopiBuffet is the perfect choice for premium eCommerce services. Not only do they offer a wide range of services, but they also provide their customers with expert support. From setting up themes and creating collections to helping maximize shopping cart potential and introducing sizing options, ShopiBuffet offers customers the tools they need to launch a successful online store.
With an experienced team always prepared to answer any questions that may arise, ShopiBuffet makes starting or running an eCommerce business much easier. So take advantage of everything this company offers and get your store off the ground with the help of ShopiBuffet!
Frequently Asked Questions
What does Shopify’s “Size chart” mean?
There are two types of sizing charts available on the Shopify platform: those displayed in an “Add size chart” form and those added to the product page.
What is a “standard size chart”?
A standard size chart is the right image dimensions written representation of your brand’s size range. The four key measures on your public size chart are typically bust, waist, hips, and height.
How is a size chart formed?
Start by generating a list of measures from rival businesses whose ideal customers share your body type, who have positive comments about their sizing, and who are your competitors.
Wrap Up – Recap and Final Thoughts
Adding sizes on Shopify is essential to providing a positive customer experience. Taking the time to create individual sizing options improves the accuracy of orders, increases customer satisfaction, and creates a smooth ordering process. Going through this process may seem tedious now, but it will save you time and energy in the long run.
By anticipating user needs and addressing common issues beforehand, you can make sure each purchase goes off without a hitch. So, Setting up sizes on Shopify can give customers the best shopping experience possible—and isn’t that what we all want?